
Fall Theme Baby Announcement

It was in the middle of October when we decided to publicly announce our pregnancy. Of course, our close friends and family members already knew about it a few months earlier. But the rest of the world had no clue this was happening. And what better way to publicly announce it, but through Facebook! (I was still very much active on Facebook at that time. I have been however taking a sabbatical for almost 5 months now. Perhaps I will come back to FB someday. I just don’t know when).
And since pumpkins are in season in October, instead of carving a scary Halloween Jack-o-lantern, I thought it would be cool to carve something that will announce our pregnancy. I don’t know about you, but the more I think of something, the more determined I get to making it happen. And so I did! I am no expert on carving pumpkins. Prior to this, I have only carved a pumpkin once. My first time was an angel. This one was more elaborate, so I did some research on what tools to use, and how to treat the pumpkin to make my “masterpiece” last longer.
In my extensive research, I came across an article (I wish I still remember where I got it so I can attach it here, but sadly I don’t) wherein they experimented different approaches to treating pumpkins and posted pictures cataloging this very cool experiment. I learned that the best way to treat the pumpkin is… drum roll please… to not use any chemicals at all. What?! Crazy, right? You just scoop out all the pulp and wash it clean. Another trick I found out that is helpful is to cut out the lid on an angle, not straight down so you can put the lid back on. The less expose the inside of the pumpkin to outside elements, the longer they last. I guess that’s why others suggest to cut the bottom instead of the top. But I find it easier to cut out the lid because I have a stem to hold on to, so I went for that instead.
First things first. Have everything you need handy.
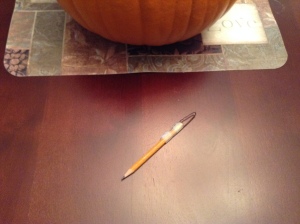
So here are all the materials I used.

2. Cornstarch.
3. Mechanical pencil.

5. Ice cream scoop.
TUTORIAL:
Step 1: Clean the outside of your pumpkin. (I washed mine with soap and water, but you can also do this by wiping it down with some wet wipes). Then dry it completely.

Step 2: Start sketching on the flatter side of your pumpkin. If you are not very good at drawing, don’t fret! There are plenty free templates available online to choose from. Print the one you like and tape it on to your pumpkin. To transfer the image you picked, trace it with either a thumb tacks, a craft knife or a small knife, or even a ball pen. If you’ll use a pen, the key is to trace hard. You want to be able to leave an imprint once you remove the paper. For those who have projectors at home, you can just easily project the image on the pumpkin and trace it using a pencil. (I sketched a drawing I saw online on my pumpkin using a mechanical pencil. I find that the point of the mechanical pencil is better for this project than a regular pencil).
Step 3: Dust your pumpkin with cornstarch. This will make your drawing stand out for easy carving!

Step 4: Carve away! (I used our small kitchen knife first to carefully carve through the outline. And then I used my handmade carving tool to scrape some more of the skin off and make more defined lines).
Step 5: Cut the lid on an angle, not straight down so you can still put the lid back on. This will make your carved pumpkin lasts longer. (I used our big kitchen knife to do this).
Step 6: Scoop all the pulp and seeds out of your pumpkin. (Save your seeds for roasting!). Wash it clean with soap and water and then pat it dry with paper towel. Make sure to dry it really well. Moisture is your biggest enemy! It can end up with mold easily if you skip this part.

Step 7: Put some lights in. It’s better not to use a real candle or your Jack-o-lantern will wilt and won’t last long. (I used our extra Christmas lights to put inside).

Step 8: (You can skip this step if you want. But for those who are perfectionists like me, I’d say it’s worth the extra time and effort). I wanted to create some shadow and dimensions to my carved art, but it’s hard to see exactly what it would like in the dark with our dining room lights on. So I suggest you turn off or dim all the lights in your work space, but leave your pumpkin lights on. Make any necessary tweaking until you are satisfied with the look of your masterpiece.
(After I was done carving my first pumpkin, I realized I didn’t have the date on it. Since this is for a baby announcement, I think the date is kind of important. So, I grabbed our other pumpkin. Unfortunately, it doesn’t have a stem on it, but it was a nice shape that’s why we bought it. I used a sharpie to write down the date and then carved it with my carving tool. Because I used a sharpie, I didn’t need to dust it off with cornstarch).
Step 9: Display your beautiful artwork (in our case, baby announcement) for everyone to see.
Comments (1)
Cute Baby Announcement Photo Ideas | sleep deprived momma
August 28, 2017 at 12:11 pm
[…] available. To read about my step-by-step on how I made our Fall theme baby announcement, click here. For our second baby, I didn’t do anything since I took almost a year and a half sabbatical […]