
Flat Doors (Hallway) Makeover
I don’t know why but for some reason, most of my DIY projects around the house were done during the time that I was pregnant with my girls, which makes bending, and climbing ladders or chairs, and painting, a little bit challenging. Nonetheless, my growing tummy never slowed me down. It’s actually the opposite! I guess you can say I was nesting!
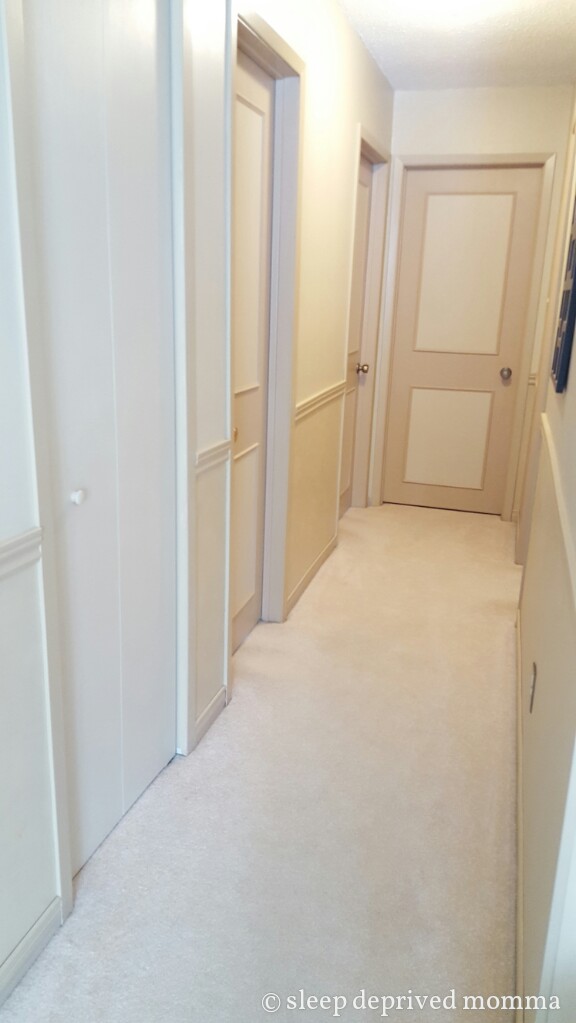
One of the projects I did while I was pregnant with our second was brightening up our dark hallway by painting all 5 doors. The doors were all plain flat hollow doors too, which I wasn’t crazy about. But to replace all the doors would cost us an arm and a leg, so I thought I can probably just spruce it up for a couple of bucks!
Here’s the BEFORE and AFTER of this hallway makeover.

Continue reading to find out how I tackled this project. Just a word of encouragement: If a pregnant momma like me can do it, you CAN too!
 So for this project, I decided I will put 2 panels per door to give it more dimension (I skipped this part for the bifold cabinet doors). I made my measurements and used a masking tape to guide me where I am going to put the trims.
For the first panel, I measured 5 inches from the top of the door, 5 inches from each side, and 3 inches from the top of the door knob.
For the second panel, I had to measure 3 inches below the door knob, 5 inches on each side, and 6 inches from the bottom of the door.
Measuring these panels would have been easier if the doors are perfectly square to the door frames. But since the house is already 40 years old, that wasn’t the case. I couldn’t entirely rely on the level I was using so I made a couple of adjustments here and there so they would “look” leveled. (I think that’s why for an old house, it’s a good idea to make the measurements while the doors are still attached to the frames to see what it would look like).
Then we went to Home Depot to get my trim. I decided to get one that is 3/4 inch wide.
As I was marking where to cut my trim, our firstborn was intrigued by the masking tape on the doors and started peeling them off! I had to eventually barricade the hallway so she can’t get to them.

Before I painted the doors, I had to prep them first. I looked for obvious dings and scratches and used a wood putty to fill them up. The bottom part of the bifold cabinet door wasn’t square (a chunk was missing!) so I had to build up layer after layer of wood putty to make it as level as it could be. And then I sanded the doors and wiped them down with a damp cloth before painting them.
BEFORE
AFTER

For the rest of the doors, I started painting the inside panel the same paint colour as the walls. (The previous owners left some paint behind that I was able to use. Jackpot!). I kept the doors attached to the door frames while doing this, just because it was in the middle of winter and I cannot bring them outside. Once the inside panel was dry, I removed the tape and carefully painted the outside panel the same paint colour as the door mouldings.
After my husband cut the trim for me, I painted them using the same paint I used for the outside panel. I tried attaching the trim to the door using wood glue while keeping it upright but it wasn’t working well for me so I had to eventually bring them down. I used some masking tape to hold the trim in place as the glue dries and then I secured them in place using a staple gun my husband bought for me.
I replaced the old metal cabinet pull with a wooden knob that I painted the same colour as the door.
Now the hallway looks so much brighter and the doors blend in well with the rest of the house!


All I need is to find a better looking light fixture to complete this hallway makeover. But we are too cheap to replace the old one. Hahaha. I might just come up with another DIY for that. Unless I can find a bargain somewhere! Who knows?
I hope this inspires you to tackle some home projects of your own that you have been putting off. And don’t forget to have fun while doing it! 🙂