
Repurposing Antique Dresser
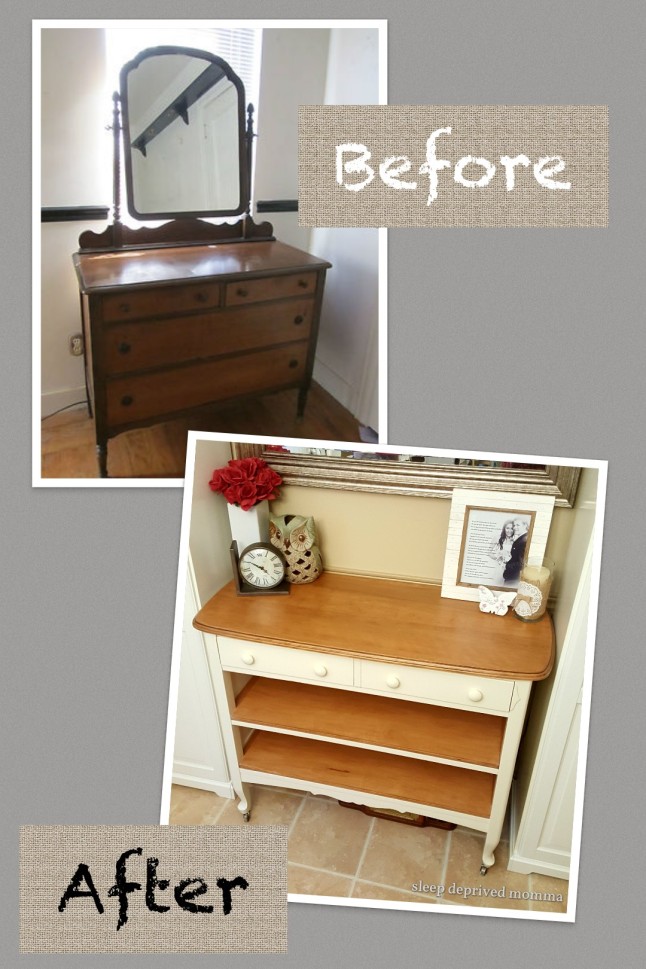
Many moons ago, I blogged about our buffet table that I repurposed from an antique dresser. You can read that post here. I was 5 months pregnant at the time with our 3rd baby and this was one of the many DIY “nesting” projects I’ve made. I wanted to write about my journey in repurposing this dresser, in the hopes of helping others, who, like me, had not done anything like this before. I wrote a draft. Unfortunately, that draft sat in my inbox of unpublished posts for over a year. I am finally revisiting it, and would like to share my experience with you.
Here it goes…
It’s a long post. So bare with me.
Prior to this project, I’ve never had any experience repurposing furniture. I’ve read a lot about it and watched dozens of videos online to find out how others did theirs before I finally dove into doing it myself.

When I bought this antique solid wood dresser in the summer, I knew I was going to repurpose it. I wasn’t sure if I wanted it as an accent piece and paint it funky, or stick to the more classic looking white or neutral colour, which is the theme I went for in furnishing our home.
So for months this antique dresser sat in our living room just the way it was.
Since I haven’t got around into painting our dining table white like I did with our chairs, this dresser wasn’t the only piece of furniture in dark stain. So let’s just say, it worked for a while. It gave us great storage space, which we were lacking in the room. We used the top 2 drawers for things we want to be easily accessible. The bottom 2 drawers were deep so I used them to store away my craft supplies. The problem was those bottom drawers were a little bit finicky to open and close, which can be very frustrating to use. So I knew the bottom drawers would have to go.
I used our dining and living room area a lot when I first started homeschooling our girls. I ended up making and buying a fair bit of hands-on activities that I wanted to put on open shelves so our girls could easily access them.
After months of procrastinating, I finally tackled what I told my husband I would do when we brought this dresser home. And boy was it a journey!
Not only was this my first repurposing project, this was also my first time to use chalk paint. I thought I’d give a chalk paint a try and find out for myself what the hype was all about. It seemed to be the “in” thing now and I was clueless as to why. When Ann Sloan first introduced chalk paints into the market, she immediately gained a following. I guess the less prep involved in using chalk paints appealed to lots of DIYers like me. However, even though chalk paints pride itself for not needing to sand or prime a piece of furniture before application, I still sanded this dresser. AND I’M GLAD I DID! It would have been double the headache if I have not. I just wished I primed this furniture as well before I applied my chalk paint. I am not sure if I would have encountered the same issues if I had used the more famous and expensive brand. But Rust-Oleum was waaay cheaper than Ann Sloan. And to be fair, it had decent product reviews.
My plan was to repurpose this antique dresser into a fresh looking buffet table with storage space for our homeschooling materials. Now that I have completed this project, I wish to give you my honest opinion about Rust-Oleum chalk paint and top coat, and the things I’ve learned along the way in the process.
Let’s take a good look at this furniture again before we dive into the nitty-gritty of things, shall we?
Presenting… the dark stained antique dresser with my husband’s back photo bombing this picture. (See photo below).

If the mirror that came with the dresser was attached to it, it would look similar to the photo below. But we never attached ours so I don’t have a picture of them assembled like this. So I went ahead and looked online for the closest picture I could find to what we have. This is actually pretty identical to ours except for the legs, and the lack of wheels.

Now that’s taken cared of. Let us proceed…
Here are the materials I used.


Now for the process, here’s my journey..
First, I removed the 2 bottom drawers and measured the inside. My husband cut the shelves, and the pieces of wood that will go on both ends. We used a scrap pine we have left over from our previous project so that saved us from buying wood.
My husband and I brought this dresser out to our deck so I could work on it. While he was cutting me the shelves, I took the wooden slats off where the drawers slide in using a small craw bar.
And then I sanded every part of the dresser, drawers included, so the chalk paint would adhere better to the wood. For the top of this dresser, I sanded it back into bare wood. I wished I have done that to all parts of this dresser, and you’ll know why in a minute. But sanding the top alone to expose the bare wood took me hours even with an orbital sander! I used 3 orbital sand papers alone just to get the top stain off.

Once all the initial sanding was done, I filled all the cracks with wood glue. After the glue has dried, I lightly sanded them, and then painted this dresser with Rust-Oleum Chiffon Cream chalk paint using a paint brush.
The first coat went on easily. When it was all dry, I applied another coat. I sanded it down by hand with a 220 fine grit sand paper. The finish was velvety smooth. I loved it! But I could see the old stain still bleeding through the paint once it was completely dry.
If I like the distressed look I could have left it as it was, but that’s just not my style. (Not yet anyway). So I painted it a third coat. This time, I used a foam roller for a smoother-no-brush-stroke-look. And it worked! The result was beautiful! I lightly sanded it and then added a Rust-Oleum Chalk Paint Topcoat using a paint brush. The key I find to avoid streaks applying top coat is to work quickly in fewer strokes going down and up, applying little pressure.
I let my topcoat to dry for hours. While waiting, I worked on making some hair accessories for my next craft shows.


After 3 hours, I checked the dresser and I WAS HORRIFIED! The paint turned yellow and the stain bled through AGAIN. I’m not sure why this happened but I was flustered! All my hard work was wasted!
The next evening, I went and painted over the topcoat with the same chalk paint using a small foam roller again, and all the yellowing was completely covered, to which I was relieved!
After the fiasco with the Rust-Oleum Chalk Paint Topcoat, I vowed not to use it EVER again. Instead I looked for a Minwax Polycrylic (in matte finish). I have used Minwax Polycrylic before with no issues. You can read about that DIY here. Our used-to-be-brown chairs are still white to this day after almost few years of daily use, and show minimal wear even though we have 2 little ones and a dog.
I also bought Saman (cedar) stain to apply on the top of the dresser and on the shelves. That night, I applied a first coat of Minwax polycrylic on the dresser. No yellowing happened, but the colour changed into a darker hue and patches of the old stain bled through AGAIN! It wasn’t as bad as the first time I applied the other topcoat, but it’s still visible and I didn’t like it.

So what did I do? I PAINTED IT AGAIN! This time I left the paint sit for days before I touched it. We had a 2 day trip in the city for a wedding so that gave me an excuse to leave it alone.
After 3 days of letting the 5th coat of paint to dry, I applied the Minwax topcoat again on the outside of the furniture. No yellowing and no more stain bleeding through this time. Finally!

Next, I started staining the shelves. I put 3 coats of stain on each side, letting them dry in between and sanding them lightly before each coat. I did the top and the bottom sides of each shelves, and I’m quite happy with the result!
Sometime in week 2 of this project, I started applying the second and third coats of topcoat. I also used the same topcoat for the stained shelves and applied 3-4 coats, sanding lightly in between coats with a 420 fine grit sand paper, to keep it smooth.
I did the top of the dresser last. I followed the same procedures I did with the shelves. I wanted the top to have a smooth, streak free, bubble free finish, so it took me 5 coats before I achieved the look I wanted.
I bought 4 wooden knobs for $1.50 each that I painted, sanded and applied 3 coats of top coat as well to replace the old metal hardware.
Before attaching the hardware, I lined the drawer with a pretty printed drawer liner that has sticky backing that I bought at the dollar store. One roll was enough to finish 2 drawers (with some left-over), which was a good saving! And then I carefully applied 2 coats of chalk paint on the top sides and top bottom sides of the drawers for a more clean look. I skipped applying top coat on these edges.


Lastly, I attached a transparent film tape at the bottom edges of the drawers, which made opening and closing a breeze! I highly recommend this especially for old furniture like this.

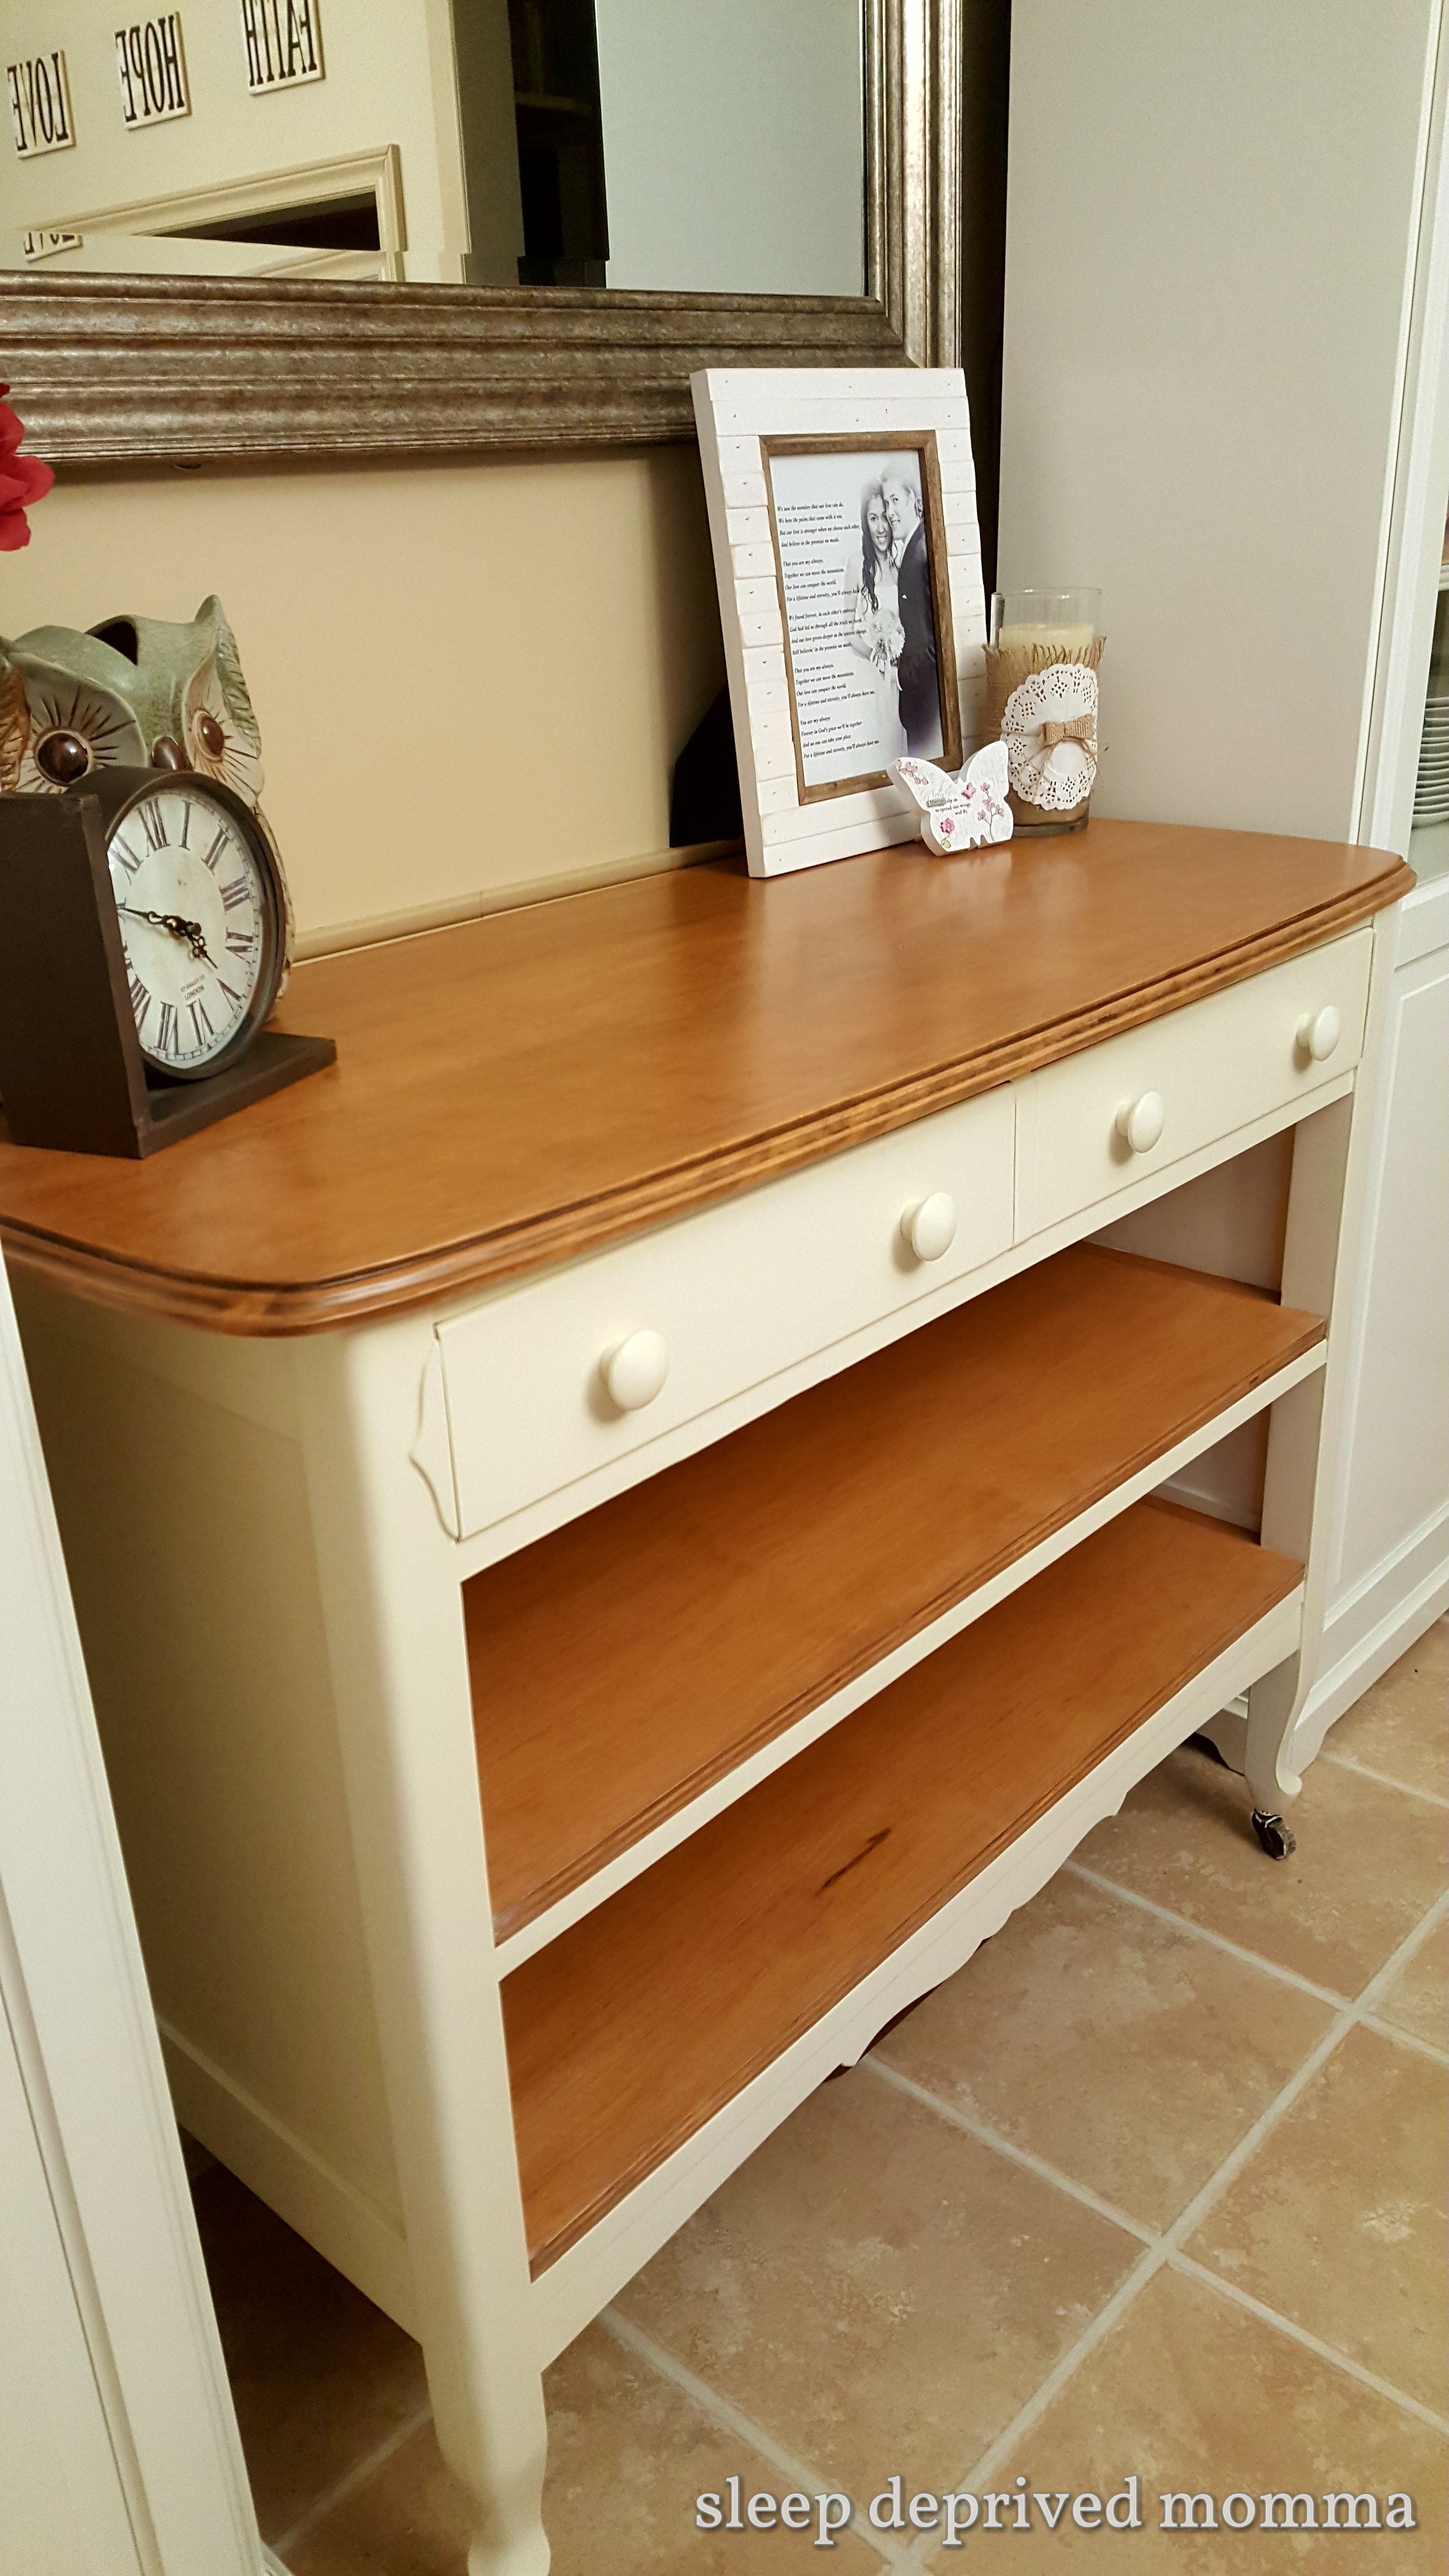
And finally, after all that hard work… here’s our new buffet table repurposed from an antique dresser.

Here’s the top view…

And side view…
Comments (8)
Barb Beeksma
March 14, 2019 at 8:59 am
Looks great !
I am almost ready to paint kitchen cabinets and hope I have learned from your experience .
Zhi
March 22, 2019 at 1:03 am
Thanks Barb! Good luck on painting your kitchen cabinets! Hope all works out for you! 🙂
this is my kitchen story
August 2, 2019 at 8:37 am
Did you use a mask while using the polycrylic since you were pregnant?
this is my kitchen story
August 2, 2019 at 8:38 am
Did you wear a protective mask while using the polycrylic since you were pregnant?
Zhi
August 2, 2019 at 9:55 am
The smell wasn’t too bad. I had our windows open a bit while I worked on it and turned the fan on. I remembered using disposable gloves, and disposable mask (especially while sanding!) but I don’t recall using the mask ( at all times) when I applied the top coat. Hope this helps!
Anonymous
August 2, 2019 at 3:24 pm
Oh yeah. The tin has a warning on the back so I was a little worried about it. Thanks!
Zhi
August 27, 2019 at 9:12 am
It definitely has some odour but not as strong as other products and other brands I have used before. I will recommend using some sort of protective mask if you are sensitive to smell especially if you are worried about it.
Kaila
April 13, 2025 at 10:54 am
I’m really impressed together with your writing abilities and also with the layout to your blog.
Is this a paid subject matter or did you modify it your self?
Either way stay up the nice quality writing, it’s uncommon to see a great weblog like this one these days.
Leonardo AI x Midjourney!